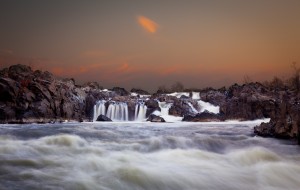
Blending multiple images to create a dramatic perspective
My previous post about HDR software described the ease with which Nik HDR Efex can create interesting, realistic and beautiful images by automatically blending multiple exposures of the same scene. Where automated software fails is in handling scenes with a lot of movement – blowing trees, or a fast moving river. Great Falls on the Potomac near Washington DC is a great location for waterfall shots, and on Sunday evening we made our way down to Fisherman’s Eddy in the park to get some photos close to the water surface. The sun was setting off to the left when facing the falls, which were already in shadow, but the sky had delicate traces of pink in the remaining clouds – a challenge to photograph effectively. HDR software would not handle the rapidly changing water as the river cascades over the falls. I set the camera on a tripod, turned off stabilization, focused on the rocks and turned off auto-focus, set mirror lock-up and finally set the camera to take 3 images one stop either side of the normal exposure. I used my cheap wireless remote trigger and took a seat some way from the water’s edge! As the sun slowly set, I took bursts of three images to capture the dark rocks and brighter sky.
Back in Lightroom, I set the color balance (to cloudy) to maintain the reds in the sky, did some dust spotting and used the new lens correction feature to reduce chromatic aberrations and “snyc’d” the changes to the other images. I then opened the three images as layers in Photoshop CS5. This version of Photoshop has made very significant enhancements to the selection tools – especially in refine edge, which can efficiently identify and separate small elements along the selection edge. This could be hair in a portrait, or trees in my case. I selected the waterfall, rocks and river and created a mask to hide this area. Overlaying the brighter image of the rocks (with mask) on the darker sky gave me a dramatic shot that looked more like the picture I saw at the time. Add a bit of curves to add contrast, some sharpening and, finally, a darkening of the edges to focus the eye on the waterfall itself and you have the image below. The “correct” exposure is shown for reference.

Great Falls from Fisherman's Eddy at dusk


