Don’t throw it away – getting a great stock image from a poor start…
I’m sure this has happened to you – you make an effort to go somewhere to get some fantastic sunset shots, but the weather is just not right – too cloudy, too hot, too misty, you name it, it has happened. One of the wonders of digital cameras is that they can often see an image better than you can, if you spend the time to get the best out of it. A recent trip to Newark (I know, I get all the best trips) gave me an evening free and I decided to go up to Exchange Place in Jersey City and take some skyline shots of New York as the sun slowly sets and lights up the buildings of Manhattan. It had been a brutally hot day with a lot of moisture in the air, and sure enough, New York was not very clear at all! I was prepared though, with my tripod, and set about taking some HDR shots to see if I could bring some life back into the images. When I say HDR, I don’t necessarily mean processed as HDR – just brackets of 5 exposures, 1 stop apart. The light conditions were not particularly difficult – hence the 5 stop bracket. I also set my camera vertically and took a number of these multi-exposure shots to create a high resolution panorama. The longer focal length that you can use in these cases probably cut through the mist a little more.
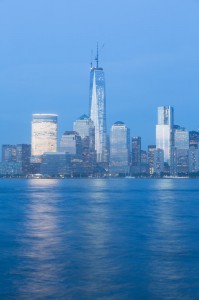
Back in Lightroom, with no processing, my first impressions were not great:
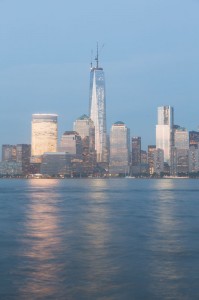
Quite blah looking with the obvious effects of the mist and high humidity. The blue color was not what I expected either with the warm lights and the sunset behind me still casting its warm light onto the buildings. Still, that is what digital adjustments are all about. I first set the white balance – to 10250 in this case, which I set by finding some white sails on a small ship in the Hudson – and that started to give me the warmer look that was closer to my memory.
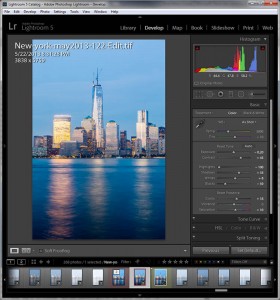
I then set about processing all my exposures. I’m a fan of the 32bit TIFF approach that I wrote about in a post last year – you export the 5 exposures from Lightroom to Photoshop using “Merge to HDR Pro”. PS aligns them and simply creates one 32bit exposure that has all the details of the 5 originals. You save that as a TIFF and it comes back to Lightroom with the details still present, and then you can make some pretty major adjustments with the Develop sliders without introducing noise or other artifacts – you are working on the full exposure data, even though your screen can only display a part of it, if that makes sense. After this step, I ended up with a much brighter and more interesting image which also shows the slider settings on this 32bit TIFF:
I repeated this three times – as I had taken three vertical images of the skyline – but sync’d my Lightroom settings across each of the final images, to make sure that the exposures and colors will be similar from shot to shot (and I had used a manual exposure to start with). Back into Photoshop now with my three vertical shots, using the “Merge to Panorama” choice. Photoshop did a great job of merging the images into one wider panorama – I just I had to create a bit of the river and sky at the top and bottom of the panorama to fill in some gaps that my shots had missed.
What next – well, I didn’t really like the way the river looked – the remnants of a boat wake across the image was a distraction and so I cloned that out using Content aware fill – many times. I then thought it would look more attractive with a more ethereal look to the water, and so I used motion blur (from left to right) across the image and then masked out everything above the waterline – ie the city. Now I had a smooth river scene with sharp and distinct skyline.
I was getting excited by this point as the image was taking shape, so I stayed in Photoshop to introduce more contrast to the buildings and sky (another simple gradient mask), then darkened the blue at the top of the image to show a gradual move to nightfall – and I thought it was getting there!
You can’t see it here, but this is still a 7500 x 5500 pixel image – lots of detail in each of the buildings on the distant shore.
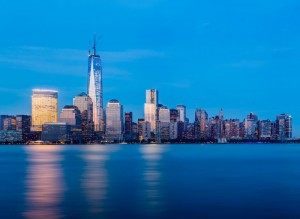
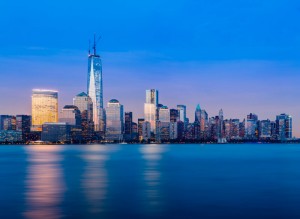
My final step, after looking at this for a few days was to decide to try to introduce something that wasn’t there on the night – the nice orange glow of the setting sun in the sky. Maybe this is really a dawn shot now, but this was trickier to achieve. I had to select the buildings – using the Quick Selection Tool followed by Refine Edge, to get a copy of the buildings alone with a mask. I was then able to apply the Color Balance filter to the underlying image to introduce some orange into the sky, and then I blended that back into the darker blue at the top of the image with another gradient mask. Overlaying my buildings (which needed some work on the mask to get it just right in the narrow gaps between the skyscrapers) gave me the effect I was looking for:
So, the moral of the story – don’t give up on the images that didn’t turn out just as you hoped (and perhaps a second moral – memory cards are cheap, don’t skimp on the exposures when you are there!)



Good article, Steve.
I completely agree with you. A good photo is not a photo camera, but a photographer.
Vlad.