Home made photo isolation table
Isolating an object against a pure white background is one of the challenges of stock photography, especially for light colored objects. If you place it on a white card and boost the lighting to get the card burnt out, the object suffers as well. I set about building a simple approach to the problem using things I have around the house.
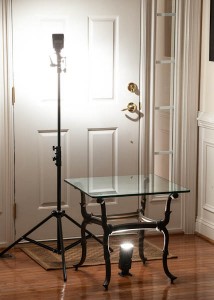
The project starts with a glass topped table, placed close to a white surface. Under the table you place one flash gun, and have a second one bouncing down from the white surface onto the table top:
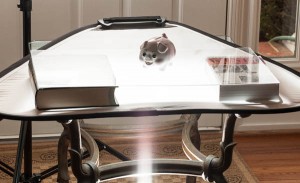
On top of the table, lay some sort of thin white translucent fabric. I use a folding reflector that I got from Lastolite – a triangular TriGrip reflector that is just the right size for my table.
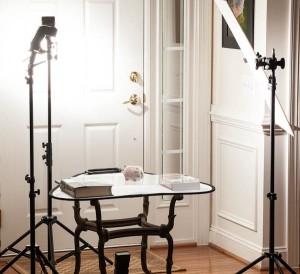
On top of that you put two similarly sized books (about 2-3 inches thick) and lay a sheet of clear acrylic or glass on top of the books. This is to support your subject and keep it some way away from the white reflector.
Finally, you can add a second flash and reflector (or flash and umbrella) to provide lighting for the shadows or to give more even light on the subject.
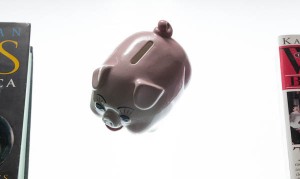
I find that with the flashguns set to half power (for faster recycling), I can normally have an aperture of around f14 with ISO200. The shutterspeed doesn’t matter, so set it around 1/160. Take a shot of the table and see if the background is fully over-exposed (it flashes black on my Canon). Then focus on your subject and increase the power of the main flashes to get the right exposure on subject. Again, I find that about half power is fine. In Lightroom 4, I then hold down Alt and slide the “White” slider until all the background goes pure white. This adjustment doesn’t affect the subject too much. Then set black point and adjust exposure to get a nice brightness level. Here is an example of a pottery pig with a low amount of top light to show how the light is coming from below:
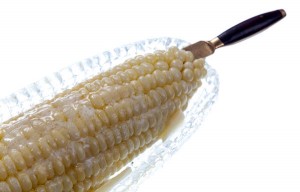
That’s it really – the white background blows out any detail in the reflector and you get a smooth even light from under the object. Here is an example with a sweetcorn in a glass dish.
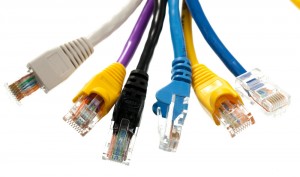
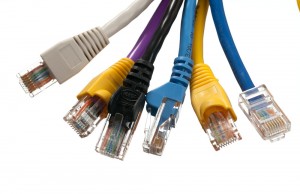
Update: A question was raised as to whether this approach would provide too much harsh lighting onto the underside and edges of an object, and would the alternative method of having a well lit white background some feet away from the glass layer provide a more controllable approach. My half forgotten physics suggested that if the exposure was correct, both methods would produce similar results, although the illuminated white background would provide more diffuse light. As an experiment, I lit some cat5 cables using both methods and tried to get the exposure of the white background correct – just going to black on my LCD screen. I then adjusted in LR4 to make the white completely white using the “white” slider. Here are the two images – I think the results are pretty similar, although the transparent plug on the right is better delineated when I used the white paper lit from above. Overall, I think I prefer the white paper look as there is less light spread onto the subject.





Thanks a lot, very helpfull. Thanks from holland :0
Chris