Macro Stock Photography
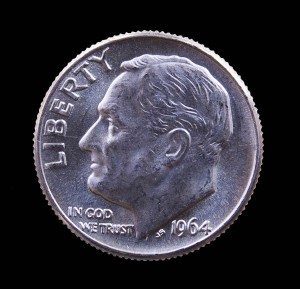
I’ve become interested in taking really close images – I recently uploaded this image of a 1964 dime (the last year that dimes were made from 90% pure silver and these early coins are now worth about $2.50 each), and in the woods in Northern Virginia, I took these lovely images of bluebells with just enough depth of focus to make the shot interesting:

Macro shot of bluebells
I’ve been asked recently how I get a macro shot like these. First a definition – the true definition of macro is that the object is reproduced at life size on the film or sensor – so if your camera has a 35mm wide sensor, then a true macro shot is where an object is no more than 35mm in size and focused close enough to completely fill the sensor. Of the two shots, the coin is about that scale – the blue bells were definitely larger, but I think they are still enlarged enough to be considered a macro shot!
The difficulty with macro shots is that you need to be so close to the object to get the magnification, but then most normal lenses don’t focus at such short ranges. There are three ways to get such a close image – use a dedicated macro lens – these are normally around 80mm and focus close enough to get that magical 1:1 ratio on the sensor. They work extremely well, are very sharp, but also are pretty expensive. Option 2 is to buy a small magnifying lens that screws into the filter holder – works, is cheap, but the quality is not very good, especially at the edges. Option 3, and the one I use, is to use extension tubes. An extension tube fits between the lens and the camera body and, in effect, moves the lens further from the sensor, allowing it to focus on much closer distances. My set is made by Kenko ( a lot cheaper than the Canon equivalent and as someone said – Kenko’s air is as good as Canon’s, a recognition that the tubes are nothing more than that – an empty tube that connects the autofocus and other electrical connections to the lens). The Kenko set has three different length tubes and you can use any combination to get the range you are looking for.
I use the extension tubes with a telephoto lens ( the 70-200mm zoom) as that allows me to be further from the object and still get a large image of it. On both of the photos above, I used the larger of the three tubes with my telephoto zoom and was able to focus from about 2 feet away. I find that focusing using the zoom control often works best – the range of focus is quite small, and the accuracy of using the zoom is more than adequate.
The next issue you face is the very limited depth of field – even with small apertures, there is not much of the image in focus. With the dime, this didn’t matter, but with the flowers, I focused on the main ones, and let the depth of focus fall where it will! There is a Photoshop technique to take a series of images with the focus moving slowly backwards from the object closest to the camera through to the one furthest away. Obviously, it needs a tripod and a still object. Load all the images in Photoshop, and use the Auto-merge command which will seek the most accurately focused edge from each of the images and automatically create masks that make one overall image that is sharp from front to back. I did try this with the flowers, but the small amount of wind made it unsuccessful.
Hope this quick overview helps – enjoy your macro photography!


