Macro stock photos using Helicon Focus and Remote
On hot days (and cold ones in winter) taking macro studio shots can be a great way of building up your portfolio. The main problem with macro images is the extremely narrow depth of field, so you can take a photo of a coin straight on, and get it all in focus, but if you wanted to take a stack of coins laying flat on the table, no manipulation of the aperture would increase the depth of field sufficiently to capture the whole pile in detail. That is where focus stacking comes in. Photoshop does have some capabilities here (in the Auto Blend commands), and they do work some of the time, but they are slow and not that great. Helicon Focus is the gold standard in focus stacking and this blog post outlines some of its capabilities. The program is available directly from their site, and you can get a fully operational 30 day trial version to see if it is worthwhile for you. The main software also comes with a neat program called Helicon Remote, which can directly control a range of digital SLRs as I will demonstrate below.
First, the setup. I gathered a good copy of each of the current USA coins and decided to make a stacked pyramid of them – if you simply pile them on top of each other, you can’t really see what the coins are, and so I laid them out carefully across the top of a piano (for a reflective surface) and had to prop some of the higher coins up with smaller coins and folded paper to make it work! As you can see, the coins are laying at a steep angle away from the camera, and so any one shot would have a very thin area of focus.
I have my 100mm macro lens attached, and also the Ray Flash Ring Flash I reviewed earlier. This is a great way of lighting macro objects as it gives shadowless light at this close range. I have the flash and camera set to manual, and the main flash is also triggering a second flash pointing at a grey card suspended over the piano to be the reflection source for the shot. When I line up the camera and the coins I can see this grey board in the background and can light it to get a nice gradation of light.
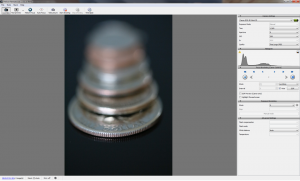
I plug my camera (using the mini-USB cable) into my computer. The maximum length of a USB cable is 15 feet, which I use, but I also bought a 32 foot active USB extender cable from Amazon. This has some electronics in the socket to allow you to extend the signal considerably, and it works great for me with my Canon. You will find a link to the cable at the end of this post. Starting up Helicon Remote triggers the live view in the camera, and you can see the image of the coins on your screen in the Remote program. Using the small focus arrows in the program, you set the near point and the far point of focus on the coins:
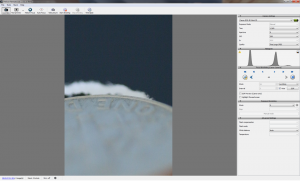
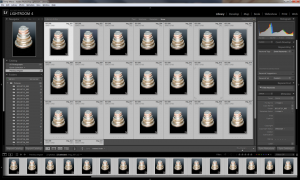
You can see the bits of cardboard that are propping up the far coin here – my plan is to extract the coins in Photoshop using the pen tool, and so this bit of visible rubbish doesn’t really matter at this stage. Clicking on “Start Shooting” rewinds the focus back to the near point, and then the program automatically calculates how many intermediate focus shots are needed for a 100mm lens at that aperture level and takes each shot in turn. It waits around 4-5 seconds per image, which is plenty of time for the flash guns to recharge themselves. In this example, it calculated that I needed 25 separate shots to cover the 2 inches of travel across the row of coins. At the end, all the images are in a new folder in “My Pictures.” Now to Lightroom to make sure the exposure, white and black points are set properly in the Raw files:
Once that is all sync’d across the other images, I export to Helicon Focus from Lightroom. This creates temporary TIF files and after a few minutes, the files open in Helicon Focus. There are four different ways that you can process the images (different algorithms to find the best focus points), but if you have taken the shots in sequence from front to back, Method B seems to be the best one.
The composing of the final image takes around 2-3 minutes with 25 photos, but at the end, you see a beautifully sharp image from front edge to farthest point. The bits of cardboard are out of focus, as I expect, as I stopped the focus at the edge of the top coin.
Now back into Photoshop (I saved as a PSD file), and I created my pen outline of the coins and put a graduated background in place behind the stack. I did this to roughly match the shade of the original background in case any of that is visible around the edge of a coin.
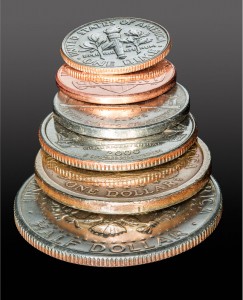
Here is the final image – fantastic sharpness with a very deep depth of field.
Plugable 10m 32 Foot extension cable


