Back in April, I mentioned the 123di Digital Photography Course, and gave an overview, gleaned from their web site, of the course contents. It appeared to be a pretty comprehensive computer based training course, but I didn’t have the time, at that stage, to properly review the details. I’ve now spent many hours going through the course, and I’m now in a much better position to give my full review of the course and its content. But, where to start – the course has so much information!
Some practical comments first. The course is available from the 123di website, and downloaded and installed as a program on your computer – both Mac and PC versions are supported.
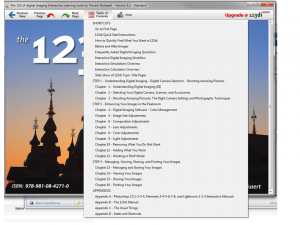
Once installed, it opens in its own window which provides access to the whole content via the Table of Contents, and the navigation controls. At any time, you can browse to a section of interest. There are two versions of the course – standard (the one I have) and the extended edition. The content is identical, but the extended version provides the ability to search, change the font, set bookmarks of interesting pages, add notes to the pages, and open on the last seen page. As the extended version is only $10 more, in retrospect I wish I had bought that version!
As the course has over 5000 pages, this could rapidly become overwhelming. To avoid this, the course has a clever solution to complexity. On most of the screens you can select one of three levels: Starter, Essential and Advanced. The starter pages give you an overview of each topic, for instance, Color Management is covered in one page. Essential gives you a deeper layer of information, and Advanced takes you to the full details available. This lets you skip through areas to get a feel for the topic and drill down on subjects you want to investigate. Full use is made of links and references, so you don’t have to read from start to finish – you can follow your interests as you see fit.
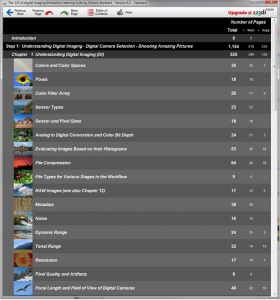
Once you click on a topic from the table of contents, you see the broad scope of subtopic chapters in that area. As an example, here is the expanded version of Chapter 1: Understanding Digital Imaging.
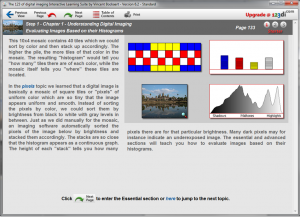
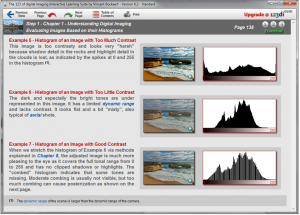
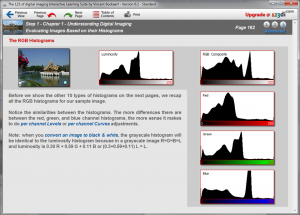
Here you can see the topics in this one chapter, the number of pages in each section, and clicking on any row takes you straight to that topic. At that level, you have a choice of the three levels of details. As an example, I’ve included screen shots of the three levels from the section on histograms. Each image can be enlarged to see the detail, and the histogram is explained in reasonable detail. This is a relatively simple example of the advanced sections though – the section on image compression, which explains how the JPEG algorithm compresses the detail in an image to reduce the file size is highly complex – covering details of how the eye perceives detail, how the image is converted to chrominance details and then how the JPEG algorithm uses that to remove details that the eye would not normally be able to see. There are also clever animations showing how different levels of compression affect the image. If you were generally aware that JPEG introduced artifacts into your pictures, this section would give you a PhD version of that one topic!
After covering the details of how things work, the course moves on to the benefits of different types of camera, how settings in the camera impact the image (for example, shutter speed and water scenes), and then a 400 page section on how to shoot images to get the impact you are looking for. At the end of this, you will know everything about using your camera to best effect.
Step 2 of the course then moves onto processing and enhancing your images in the computer. The chapters are generally independent of a particular software solution (ie you don’t have to have Photoshop to follow along). In fact, there are appendices on Photoshop CS1 -4, Elements 3 – 8, Lightroom 1-3 with full details of how to use those various packages. As an example, the Lightroom appendix contains a full worked example on how to develop an image from a poorly exposed snapshot into a pretty nice photograph. Step 2 covers enhancements to composition, color, light, removing items, adding items and a full chapter (400 pages) on working in RAW mode.
Step 3 takes you then into managing, viewing, storing, sharing and printing your images – each one comprehensively covered.
I’ve realized that this review could continue for ever… There is so much information in this handbook/course, all of which seems to be well and clearly explained. Animations help, worked examples of processing images let you see what happens in each step, and some of the technical detail is amazingly complex. As I mentioned earlier, if you really want to understand a topic, this book will take you to any depth you desire!
What are my overall impressions? It is a great resource for almost any type of photographer. If you are a beginner, you can get a rapid overview of how to move from simply taking snapshots to taking control of your camera and your images. If you are a skilled amateur, there are areas here that you will not know and will help you evolve your photography. If you are an expert, you will find some of the advanced sections fascinating. I’m glad I bought it and would happily recommend to anyone.
If you want to obtain the handbook/course, it is available from the 123di website together with a demo version if you want to have a look at some of the contents and details.



1 Response
[…] […]