Updating my Fine Art portfolio website
Back in 2014 I decided to create my own “Fine Art” portfolio website. It was not particularly to sell images from the site (as I know how hard that is!), but to have somewhere where friends could look at some of my better photographic efforts. I decided to use the Photocrati Theme and explained the process back in this post. I decided that it was the best wordpress photography theme that I could find and at the time, I thought the theme was pretty easy to use and made an OK website without the annual costs of the online portfolio sites. I recently tried to add some more photos to the site and found that an error I had made in one of the server files meant that the home page was visible but all the galleries were inaccessible – a great example of checking more than the first page when you move a site to a new server! While working on it, I also noticed that Photocrati had totally rewritten the theme to incorporate the NextGen gallery and slide show technology and made the whole thing much more responsive to different screen resolutions and devices. Although the new Photocrati Pro theme was $79 (and they try to make you sign up to a recurring $79 for updates and support, which you can cancel later), I decided that my photographs were worth it and decided to give it a go.
So here is my review of the new Photocrati Pro WordPress theme!
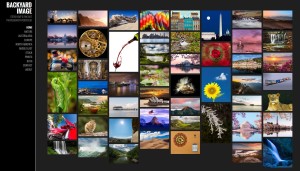
I went for a clean and simple layout (although there are many to choose from with more traditional menus along the top to transparent backgrounds where the slides show over a background image). It all sizes very nicely to fill the screen when the uploaded image is large enough. The actual update process is pretty simple. I bought the new theme from the Photocrati website and downloaded the zip of the theme and also the zip of nextgen-gallery-pro that comes with it. In WordPress you can then add this as a new theme then follow the instructions in the admin area to add Nextgen Gallery (online) and then upload this nextgen-gallery-pro. The instructions on the website are pretty clear.
I first took a complete backup of the site to my home computer and hard drive, which gave me access to all the photos. In most cases these were only 960 pixels wide in the original design. As it turned out, this “safety first” step wasn’t needed as nothing went wrong in applying the new theme.
Updating the galleries was quite a painless process – all the current galleries transferred automatically although you can’t change them any further. So you can stop at this point and just focus on getting the theme to look right for you and all your existing galleries will transfer across. However, upgrading the old gallery to one of the new designs is very easy. Just go to the page holding the gallery, make a note of its name, then delete the old one. It will warn you that you can’t reverse this action. However, once this is gone, you can just add a new gallery via the “add gallery” button, search for the old name and the photos will be added in the display format of your choice on the page after it has been published.
I’ve now started adding new areas and trying to bring some structure to the site, adding a West Virginia page, and finally three new galleries with larger images inside that page. I used the Albums function as visual menu items on these intermediate pages. The new galleries – New River Gorge is an example – use images that are 1800 pixels on the longest side (now that I think about it, it would have been better to export them as 1800px width!). I chose the Pro Slide Show option for the format to simply focus on the images, although the descriptions are visible underneath each image.
There is an ecommerce section to the site where you can set your price (for downloads I assume), but I haven’t investigated this.
I still have some work to do to tidy this up and bring my newer images into the site, but so far, Photocrati Pro has been a simple way of getting an online portfolio up and running!


