How to take fireworks over a city
This July 4th, I went up to Pittsburgh in Pennsylvania to see and photograph the fireworks display over the city. Although only 70 miles away, we decided to stay for a couple of nights both to get the best idea of where to shoot the fireworks and to get some other images of the city as well. As I started to realize, getting everything right about fireworks, especially if you want to position them with the city itself to give the context, is more complex that it appears! First, I did my research. I found a local professional photographer with a gallery near the hotel so first stop was to visit that and hopefully chat with the photographer. He wasn’t there, but his assistant was very helpful in explaining the lie of the land! He has some great shots of Pittsburgh if ever you are looking for some! He also had some great shots of fireworks over the city on his blog with more details on where he was for the show – so that is the first problem solved – where to go!
I chose a location by the Point of View statue on Mount Washington and scouted it out earlier in the day to see where I might plant my tripod. That brings out the next issue – when to arrive?
Even by mid-day, people were already spreading blankets on ground and strategically placing chairs for the evening, although many of them were unoccupied. I decided to go and find my spot around 5pm for a 9:30 show! Next problem – it was 95 degrees (35 for most readers) and humid. After plastering on the sunscreen and being prepared with an umbrella for a shade, I was lucky enough to find that I could sit in the shade of the statue and that was more pleasant. I was the second photographer there and had a good chat with my neighbor – who very kindly shared his beer with me – so getting there early has its benefits. I found that many people had just spread a blanket or placed a chair and just left them there – it shows the innate politeness of most Americans that even though they were still empty until perhaps an hour before the show, no-one tried to move them, or encroach upon their saved space! As more photographers started to turn up, I did chat to others that had taken photos of the fireworks from that spot before and moved my chosen position slightly to see both the barge launching the fireworks and that bridge in the bottom right of the image. So always take advantage of local knowledge if it is available! Incidentally that photographer, Scott Bowen, lives near DC and had some very nice images of that city (and elsewhere) on his site. Now what to do while waiting? Take more photos of course!

This is my original spot – the fireworks shot shows the slight change in perspective – but it was the right move I think. As the hours passed, I thought about the exposure I was going to use. Taking photos of fireworks over a city is different from just images of the fireworks. You have two competing issues. One is white balance. I read that fireworks generally look best with a daylight color balance to properly show off the reds. Cities at night, benefit from a cooler white balance. Of course with raw files, you can change that after the fact, but as I planned some videos as well, I decided to go with a fixed white balance of 5000. Exposure was next. Firework shots generally are created by choosing an aperture and then keeping the shutter open for some number of seconds to capture the fireworks as they develop and fall to earth. With the lights in the city, you need a specific exposure to get those correctly exposed. In a way, firework exposure is a little like flash – it doesn’t really matter what the shutter speed is – the aperture is the key factor (with ISO) to think about. So I decided to look for an exposure for the city which didn’t over-expose the lights and signs on the buildings and had a shutter speed of 4 seconds. I was able to practice with this combination of ISO, shutter speed and aperture as the night deepened, and I ended up with 200 ISO, 4 seconds shutter and F8 for the aperture. I found that with that combination I was not overexposing the lights in the city and the firework trails were generally not over-exposed either.
Unfortunately, hot humid days are also famous for thunder and lightning. From our vantage point high above the city, we could see a developing storm to the north and east and so I got to spend an hour or so trying to capture lightning. This is when you wish you had one of those lightning detectors, but I used a variable ND filter to really lengthen the exposure and took shot after shot trying to capture lightning bolts:
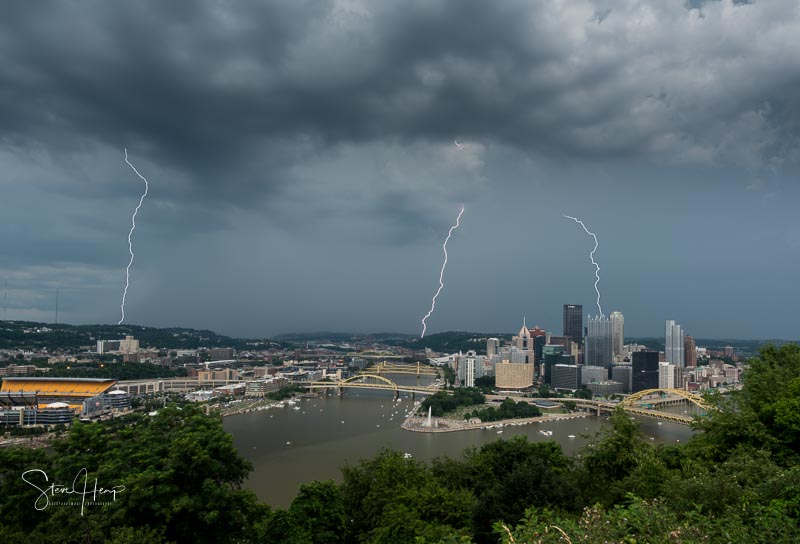
OK – this is cheating – this is a composite of three separate exposures, but it was quite a show. I did worry about the chance of lightning hitting our location, but it didn’t! Although we had a few rain drops, the heavy downpours stayed to the north and we were OK (and cooler) as the storm blew through.
Next question – what lens to use. This was pretty easy – the view had to be wide and high, because I knew the fireworks would be to the left of the city itself and would go quite high into the sky. So I simply took my 16-35mm lens and stuck with that. With so many people around (and there were thousands at the end of the evening), I didn’t want to lose other lenses in the rush to get out.
Finally, the show started and I just tried to time my 4 second exposures before the next volley of fireworks was released. I knew I could always combine shots later and didn’t want too busy an image that comes from having the shutter open too long. I probably ended up with about 100 shots over the 20 minute show.
Incidentally, I saw an article about a neat trick to change the focus of the lens during the exposure and create “fat” firework trails:
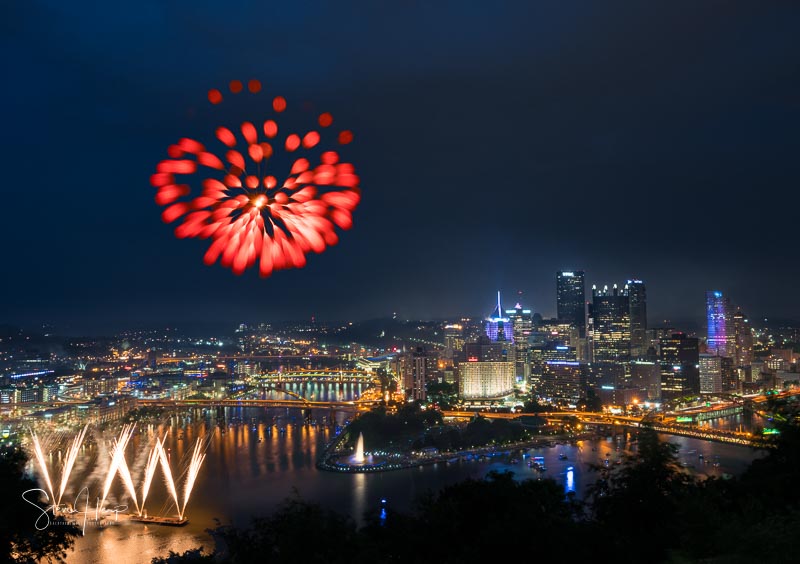
I think this is best when you go from out of focus to in focus during the shot, but that is beyond my skill level (especially with the “focus by wire” approach of my lenses where there isn’t a specific point where the lens is at infinity). So I started in focus and went out of focus during the shot. The city is composited back into the shot as that was defocused as well, of course.
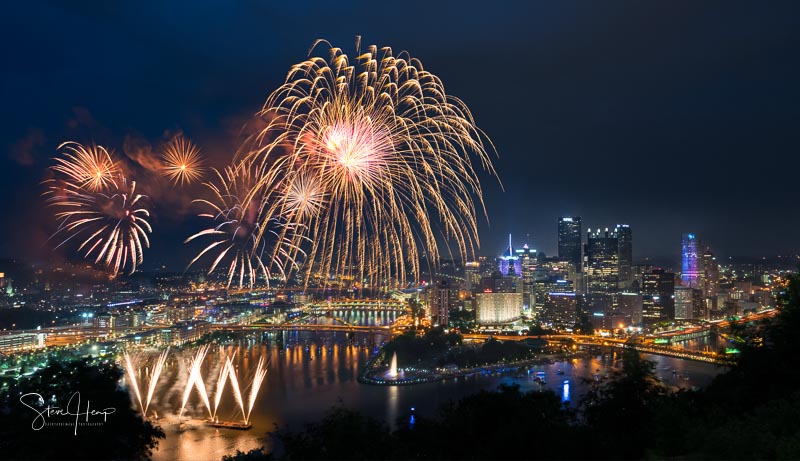
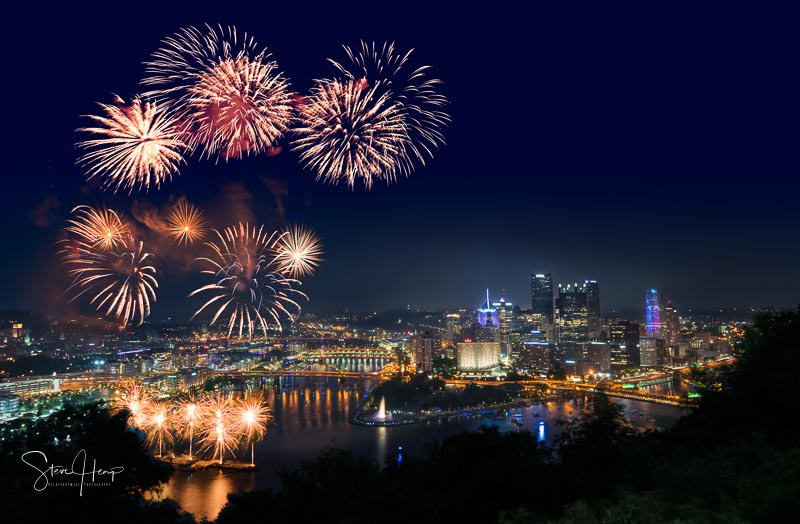
Final step – processing. For some shots, I decided to use a base exposure of the city that I took before the show started and I processed that to make it as good as I could for a city skyline. Pittsburgh buildings seem to be quite dark but I was able to balance the brightness of the road lights and building signs to get a good image. I could then work on the exposure and color of the firework trails in their own images and then composited just the trails on this base image. I used the “blend-if” layer setting in Photoshop to allow the bright lights of the fireworks to show through and added a mask to remove any bright city lights that were in the wrong position. Ideally I should have kept the camera/tripod completely still for the whole show, but I did a bit of zooming in and moving the viewpoint as I realized where most of the fireworks were going. We were lucky that the wind was blowing the smoke away from the city, incidentally – you can’t plan for that, but it worked nicely on this evening.
This one is composited:
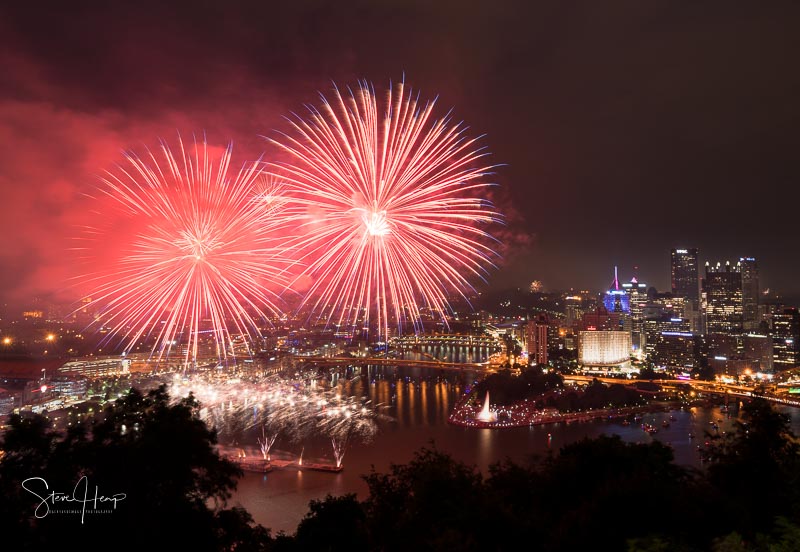
This one is “real”!
It is always difficult to decide on the “best” shots, and not create so many that they get rejected by stock agencies for being “similars”. I ended up with nine shots that I thought were the best.
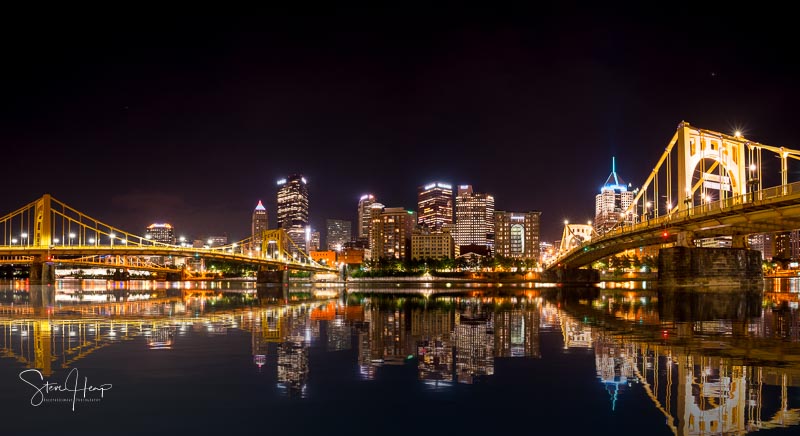
Finally, getting there a day early did give me a chance to take some night shots from the river trail. This one was a panorama of six shots stitched together and then the water replaced by a “flood” plugin reflection instead as I have described before. The original was OK, but the water was a bit dirty colored and the reflections were not very clear. This is a lot more dramatic!
I hope this will help when you next plan a fireworks shot!


Great article and fabulous shots, Steve! Thanks you, very helpful and informative!
Thanks! I was very pleased with how it all came out in the end!
Nice shots 🙂
Thanks!