
Stock Video – Part 3. How I do it…
The earlier posts on this subject have covered the basics of what stock video is, and then more detail on the sort of clips I have been producing. Now I’ll focus on some details about how I go about getting the clips taken, edited and uploaded to the five agencies I support: Shutterstock, Adobe Stock, Pond5, Storyblocks and iStock.
The first step obviously starts in the camera. I’ve been choosing to shoot in the PAL standard of 23.98. There are many debates about this, some saying that the 30 fps normally used for US television allows you to downscale to the European version if needed, but others point out that movies and high end commercials are normally shot at 24 fps as well. I’m not sure it matters! Where it does matter is what shutter speed to set. Unlike a still image where you can pretty much set any shutter speed for normal landscape type shots, using a high speed shutter on a video will create an effect that can look quite jerky. As a result, films and video generally have a rule that the shutter speed should be numerically around twice the frame rate. So with a frame rate of 25 fps, the shutter speed should be 1/50th second. That means that you might have to use a very small aperture (which might not be what you are looking for visually) or use an ND filter to reduce light coming into the lens. Often we want a relatively wide aperture to focus on a face, for instance, but in sunlight that will almost certainly need an ND filter. Interior shots are a different case – your issue will often be getting enough light to reach 1/50th a second which is where higher ISOs and LED lighting comes in. I’ve found that ISOs up to 1600 are fine on my Sony. Videos are moving images and so it is harder to zoom in and see the noise in the shadows in normal use, so you can probably get away with a higher ISO than you would use on a photo.
Indoors I almost always use LED lighting. A lot of people swear by the Rotolight NEO II – I really liked the look of that, but decided to be a cheapskate and buy two Aputure lights instead in a kit. I got two lights, batteries, tripod stands in a kit for $399 (when I bought them). I see they are more expensive now which perhaps makes it less worthwhile, but they are solidly built, run off batteries for what seems like hours, and have included filters to move the color to tungsten from daylight. They won’t light a massive scene but for most interior shots they have been fine for me.
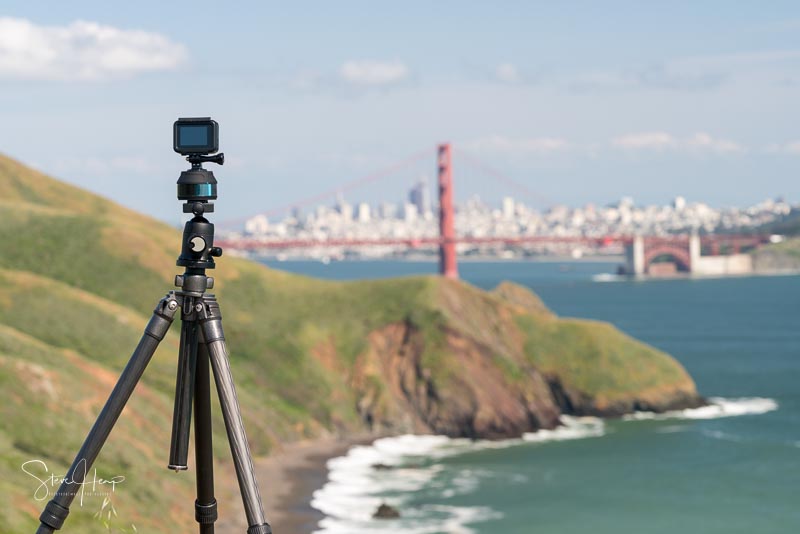
I take all clips at 4K resolution and save it using the highest bit rate codec (100Mbit/s on the Sony). I do sometimes take HD shots with my GoPro – especially those on the sucker mount on a car – because the GoPro can stabilize the video at that resolution. I’ve also taken timelapse and rotation shots on the GoPro as well (which is what I’m doing in the photo above).
For a long time I used Photoshop to edit my shots – which basically is setting the in and out points and maybe adjusting the exposure or saturation. Photoshop can export in an uncompressed format to your hard drive, and then MPEG_Streamclip can basically convert any video into another codec standard or size. As a free program, it has been great. However, I’ve now moved on to Premiere Pro so that I can make use of its great stabilization effect (Warp stabilizer) which can smooth out any shakes due to camera movement when you are handholding or when taking close up macro panning shots.
I’ve also started taking some of my 4K shots (which often are quite static because the camera is on a tripod and I am probably the “talent”!) and then using the motion and zoom effects with keyframes in Premiere to pan and zoom into the shot. I can upload the original 4K video as one shot, and then downsize the modified clip to HD and upload that. Here is an example with the original first:
and the one with zoom and pan:
Of course the buyer could also do this, but sometimes people just want a finished product to slip into another production.
Then I come to the export process. This used to be quite simple – choose PhotoJpeg as the codec and press “Export”. But now the latest version of Premiere Pro has dropped support for PhotoJpeg and the Adobe Stock contributor guide now only says they accepts DNxHQ and ProRes! At present they are accepting PhotoJpeg, but I guess the writing is on the wall. The big fly in the ointment is that Shutterstock doesn’t accept DNxHQ and so for Windows users there is no defined codec that is accepted by all sites. Not good! Hopefully Shutterstock will modify their approach before Adobe Stock drops its support. My present approach is to fall back on the old one of exporting from Premiere to an uncompressed codec, then using MPEG_Streamclip to make a PhotoJpeg version of that. To be honest it is a relatively painless method for me as long as Adobe Stock keeps accepting that clip.
Keywording and describing for me is just a part of StockSubmitter’s capability. I often have a still image similar to my video and so I simply copy all the details from that to the video and perhaps add a few video related keywords like pan or zoom. Then it is simply a matter of letting the system upload and submit for me. I did recently discover that you can set the thumbnail image to be used on the stock sites as the image for that video. You can right click the video and choose Select Video Preview. I haven’t yet confirmed that this works all the way through the agencies systems, but it just shows how comprehensive StockSubmitter is!
Hope this brief series of posts has helped fill in some of the blanks on stock video. As always, ask me any questions and I’ll try to answer!

How has iStock been for you in the past 2 royalty statements in regards to your videos? Been hearing about some $0.40 for 4k video. Did you get any of those?
I’ve only sold 3 videos on iStock in the past 2 months! Each for $1.30. The originals are 4K but I have no idea what size or rights the buyer got for $1.30.
Hi Steve, just seen that you came from Oswestry – not far from where i used to live! (Also lived in the Lake district for while).
Question, help appreciated. Just been phoned up – can I do some videos – said, (Yes of course!!). Edelkrone Surface One and your other recommendations are going to be a must have. Germany cannot send to Andorra, but B&H USA can. Does the USA model work in Europe? Are there any extras that I need to order at the same time: Germany wanted to know what camera and which cable. Any advice much appreciated. If you get any benefit from my mentioning your name etc, please let me know – happy to oblige. Thanks so much for your helpful webpages and articles – living and working on my own, it is like having a friendly face looking over my shoulder!!
Interesting – small world! I still go back there regularly to see friends. Nice part of the world!
Thanks for thinking of me with this purchase. I did try to get an affiliate agreement with B&H, but they didn’t agree. I have one with Amazon, but they don’t sell the device. The device is powered by a Canon camera battery so you need to make sure you order one of those and a charger. From what I recall, it didn’t come with the battery. I also bought that Flex Tilt head, which I think is necessary to be able to position your camera at the right angle. You could get away with a good tripod head, but that doesn’t give any flexibility on height. So as long as you can charge up your battery there is no dependence on US voltage levels. So it should work fine.
I have applied for sponsorship from the company – not sure how that will work out, but I did mention that at least 2 people had bought this as a result of my recommendations. You do get a cable that fits with your camera. It was for some some of timelapse I think – I’ve never used it!
Good luck!
Steve
with regard to Export, I use StSub for All Video to same sites as you + more ! Mp4 from my Sony, Samsung and Mi cameras, then into DaVinci Resolve (stabilise and grade) then into StSub !! No conversions needed ! 🙂
I always thought it wasn’t a good idea to decode from MP4 and then re-encode to MP4 because of the lossy nature of the codec. So I now just use ProRes for all my exports. The file size is huge, but perhaps some people would choose that as a download because they know the quality could be better.
does it decode/encode ?? Resolve uses the MP4 file as is ! it only modifies it I think ?? I’m no expert, but most sites accept my footage, so must be ok 😉
Yes, it is a bit like a jpeg. Your image editor needs to recreate a pixel based image so you can alter the colors and then you save it again to a jpeg, compressing it again. Any time you are going to alter the pixels in a video file, you need to create the original pixel based frames, modify them and then re-encode the video into a “package” using a codec. H264 is very efficient (ie it throws quite a lot away), but it does it well. ProRes doesn’t lose much detail at all, but the files are very large. Most of mine are about 1GB in size when I upload them.
Ok ! I follow all that 🙂 and maybe it’s not the best way for perfect video, but it’s quick and relatively simple, by comparison to other methods, and as long as the stock sites are accepting my work, I’ll continue this way for the time being 😉